Phishing Analysis and Response
DTonomy Automation can help analyze your suspicious emails in both Gmail and Office 365.
Typical steps for analyzing phishing email alerts include parsing email entities such as sender, receiver, urls, attachment and correlating with other threat intelligence. DTonomy has built-in playbooks to get you started quickly.
To get started with the built-in phishing analysis process, here are the steps:
1. Select automation menu and playbook
Select the automation menu, under playbooks, click "Analysis Phishing Email" playbook.
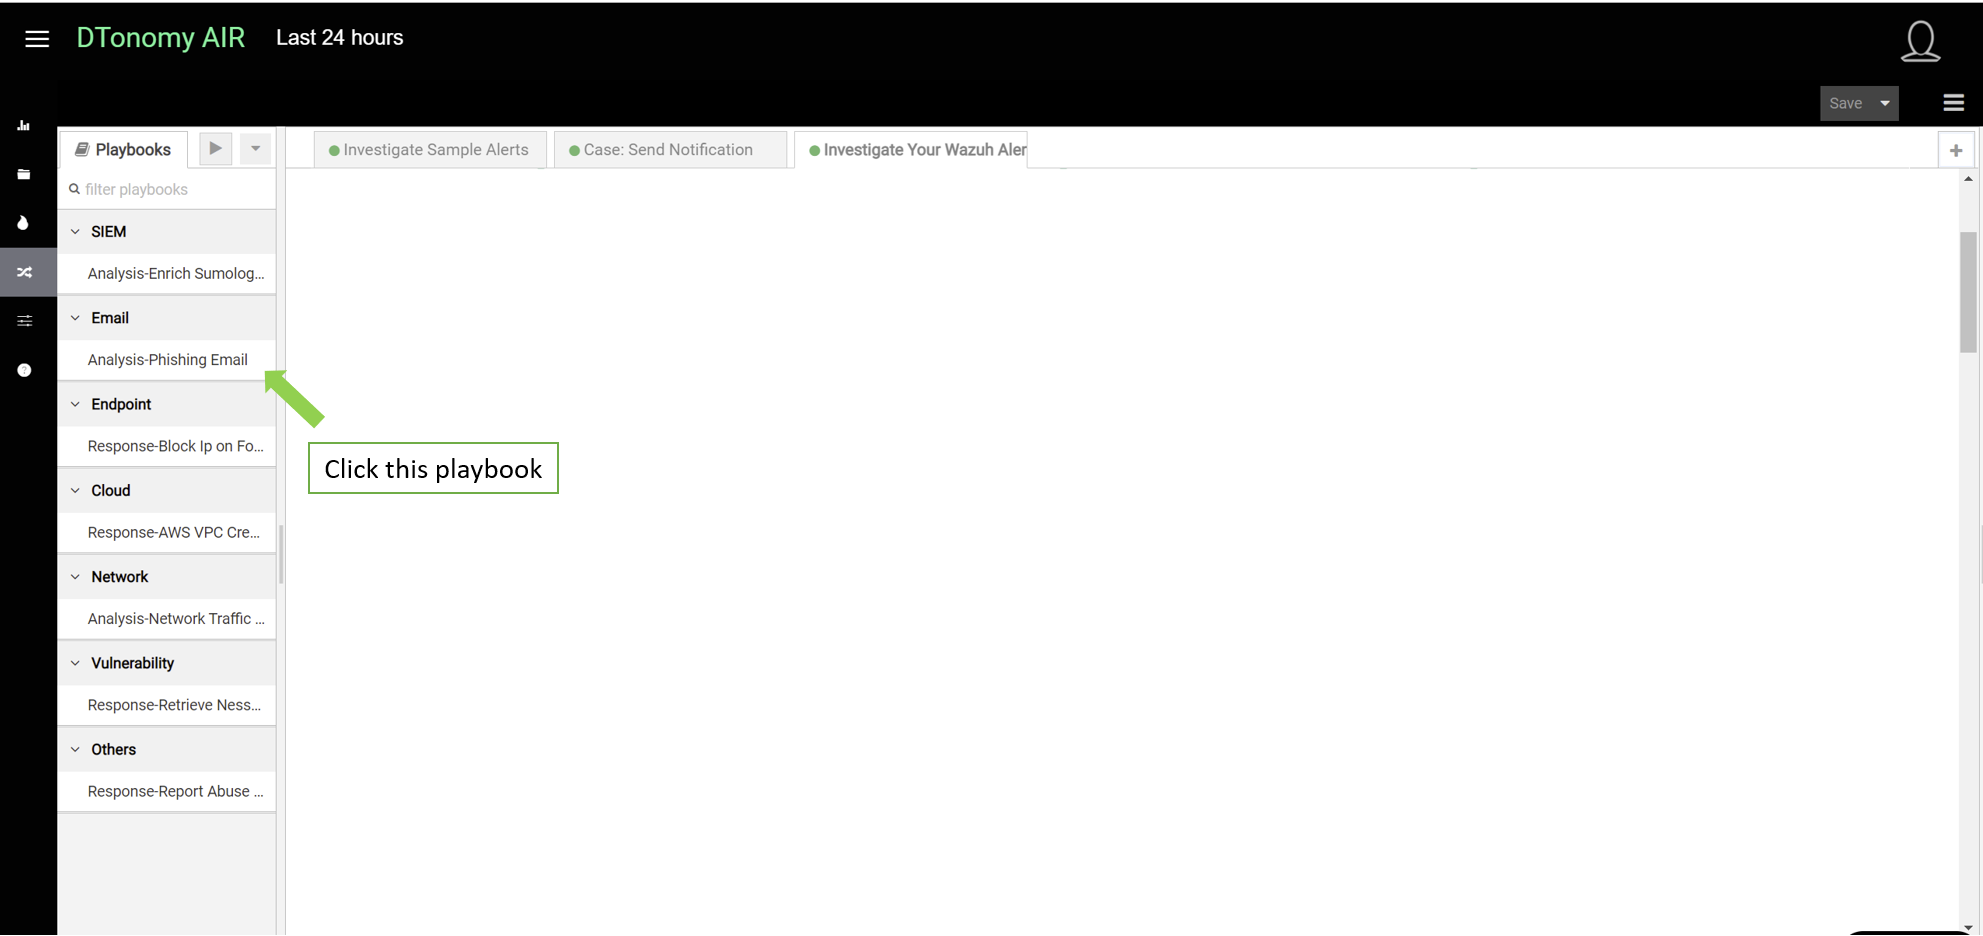
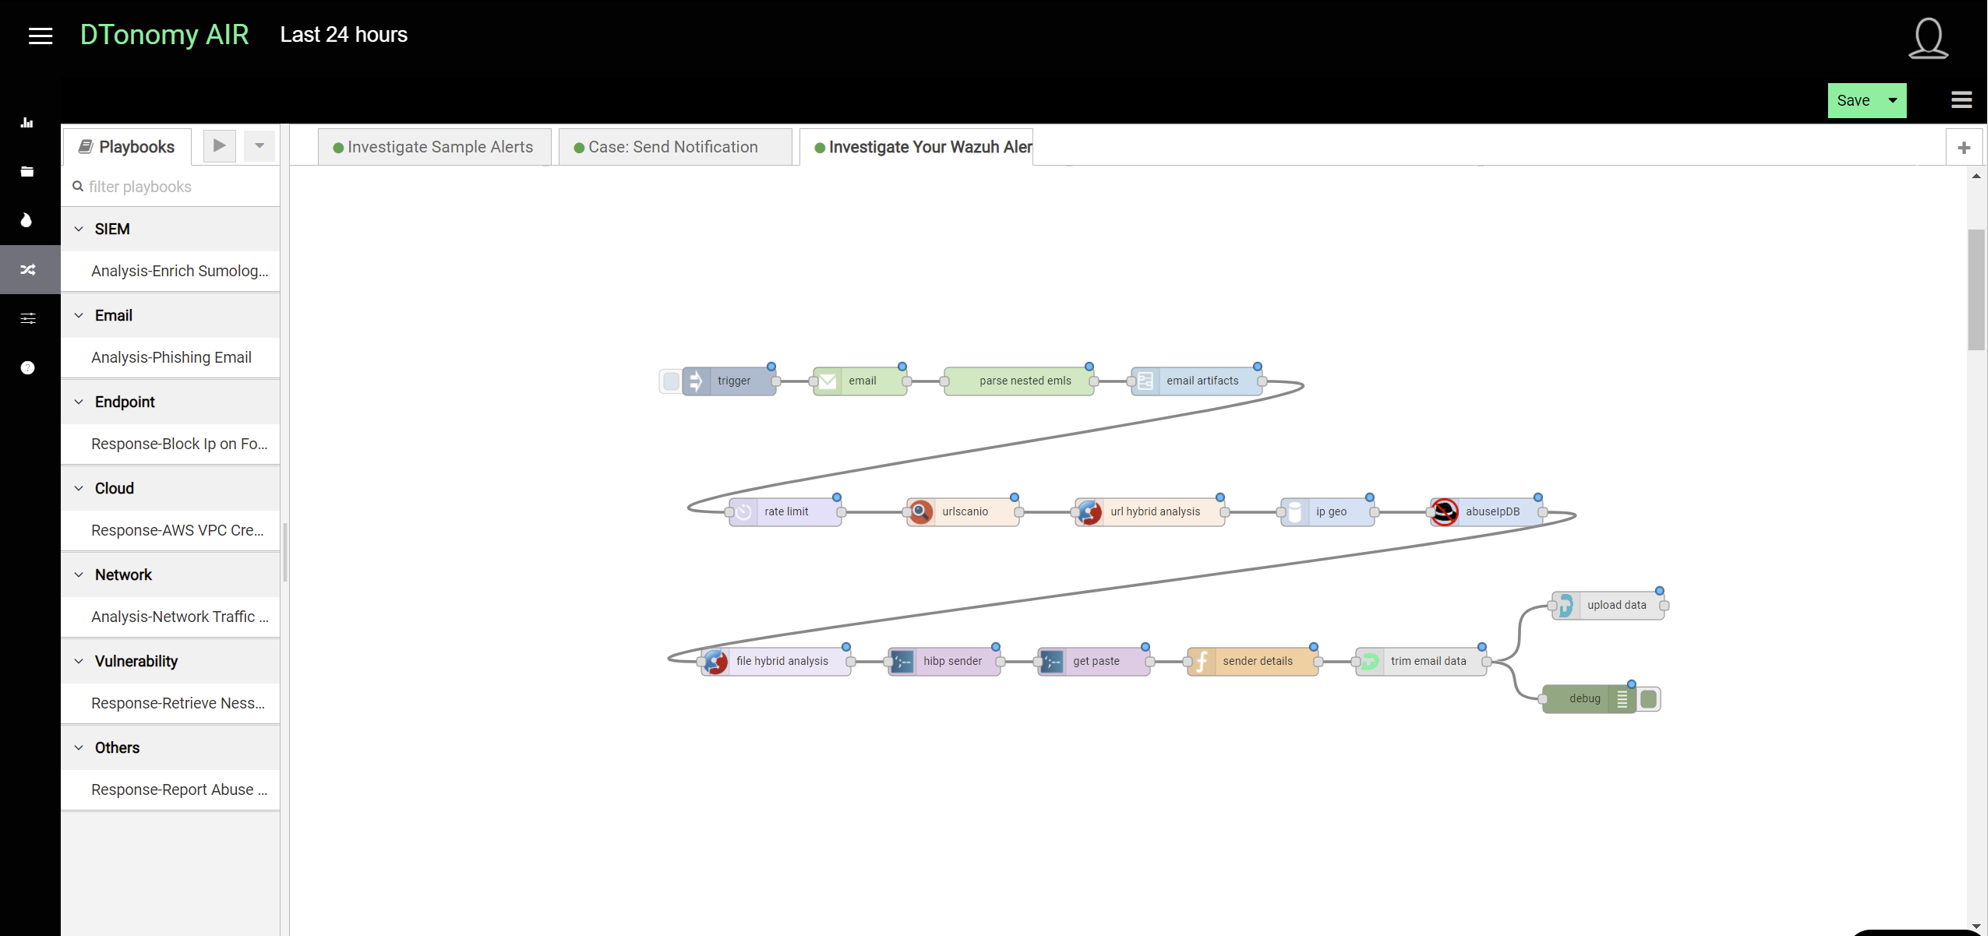
It will show up on the workflow editor on the right side as shown below.
2. Retrieve email address
To enable it to retrieve your email, double click email node to open up the configuration window.
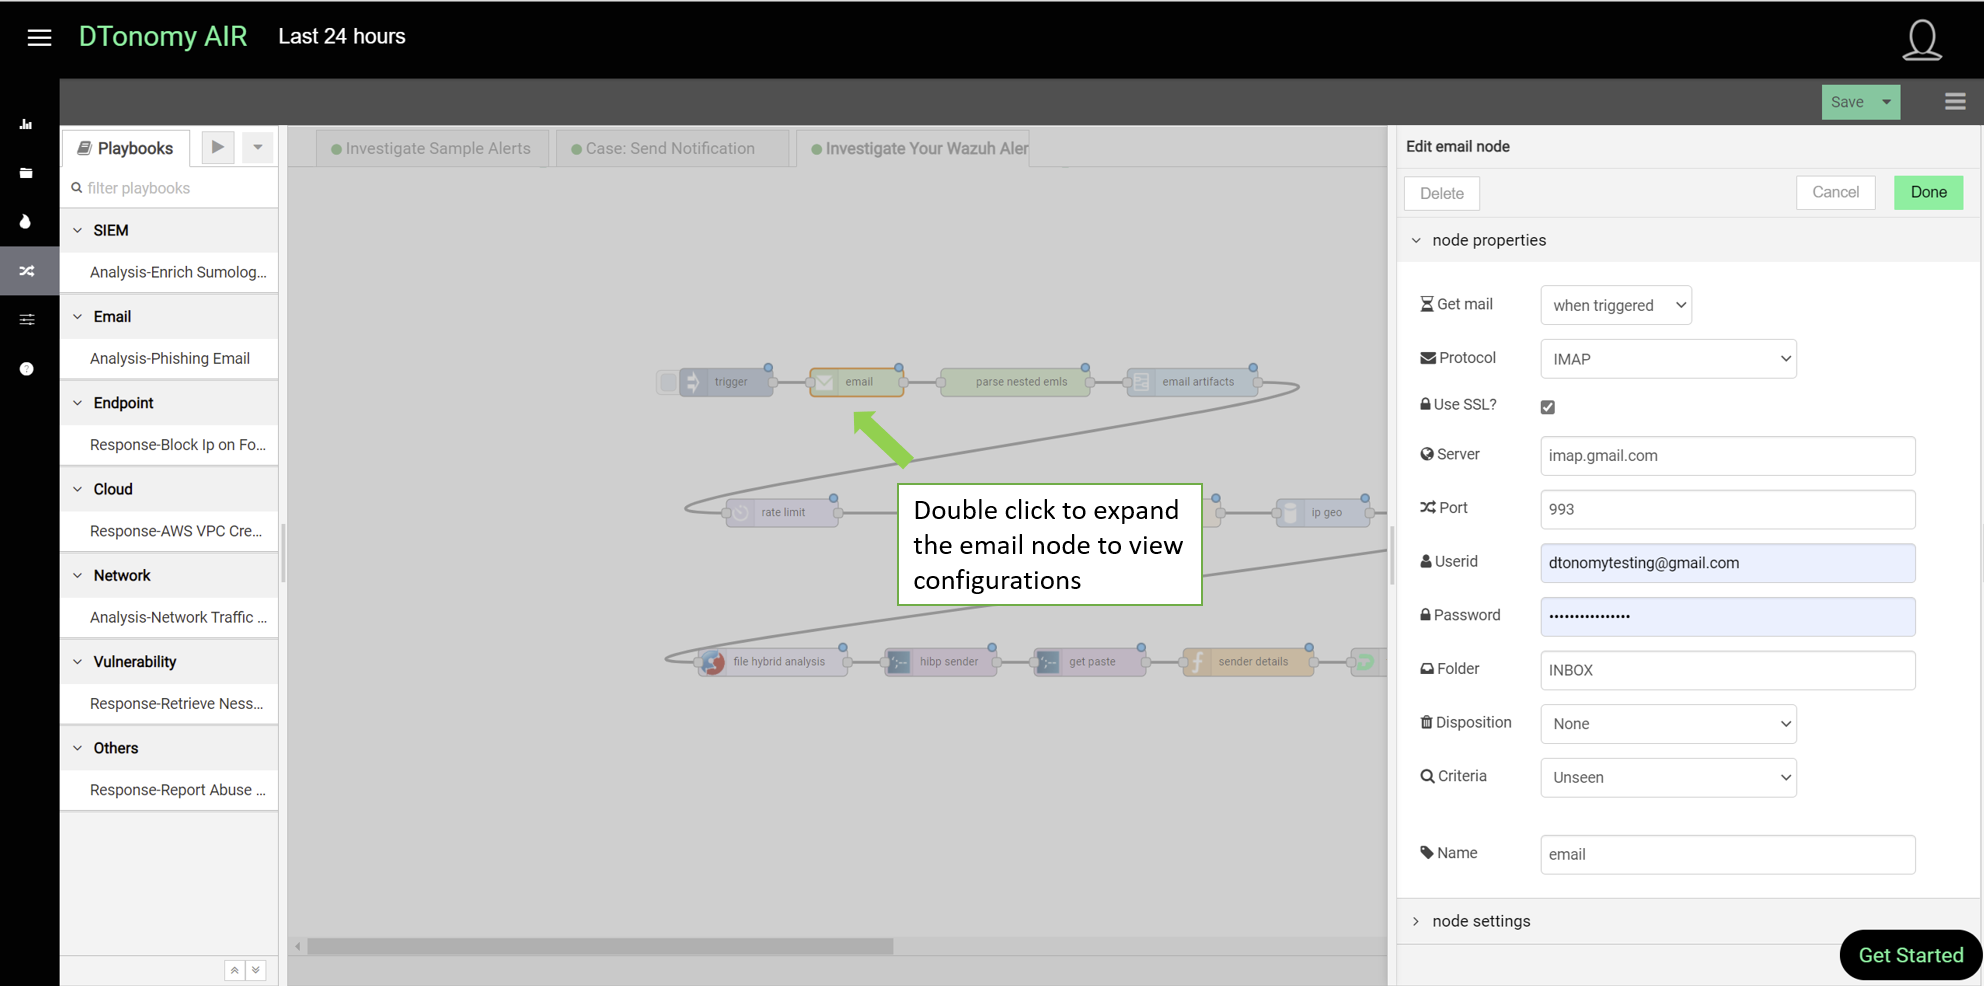
Fill in the userid and password of your email box. For GSuite managed email account, you will need to use App Passwords instruction.
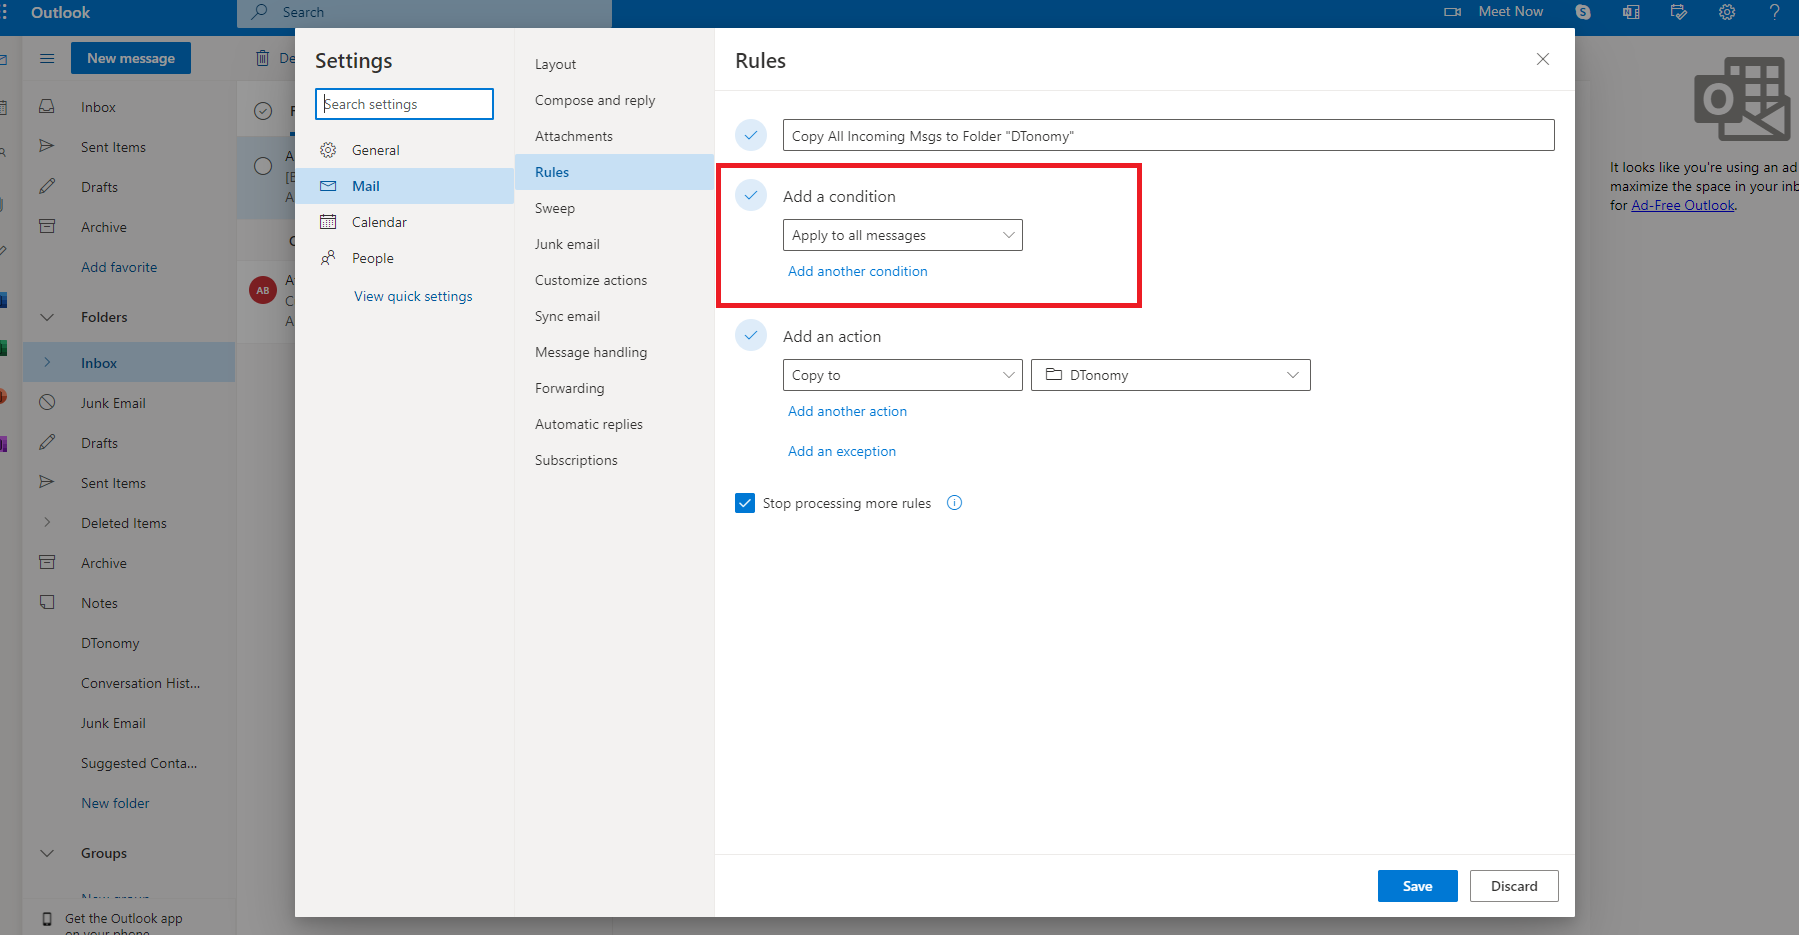
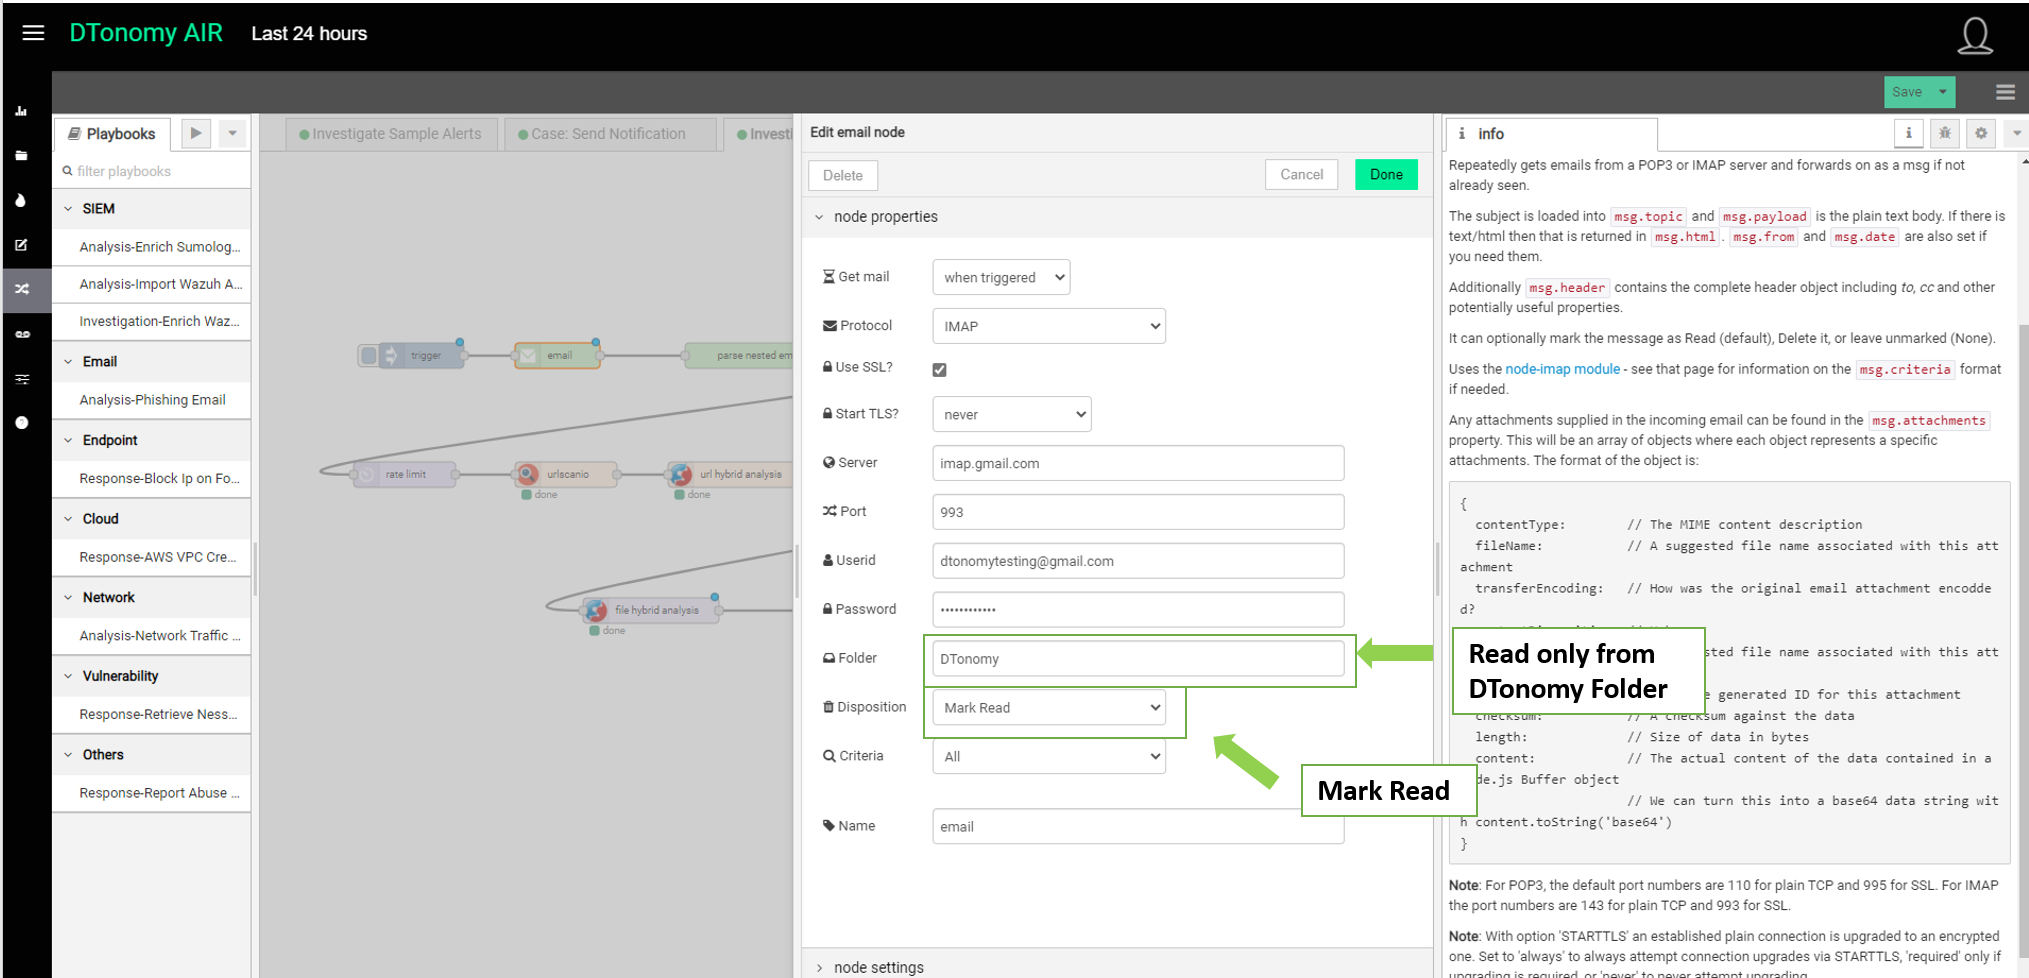
Configuration for your email inbox: To avoid polluting your current inbox and enable DTonomy to continuously analyze your incoming emails, we strongly advise putting all emails you'd like to analyze into a separate folder - DTonomy. You can achieve this by creating a rule in your email inbox to save a copy of emails to the DTonomy folder. Here is an example in outlook.

And in the email node, set Folder to DTonomy and Disposition to Mark Read
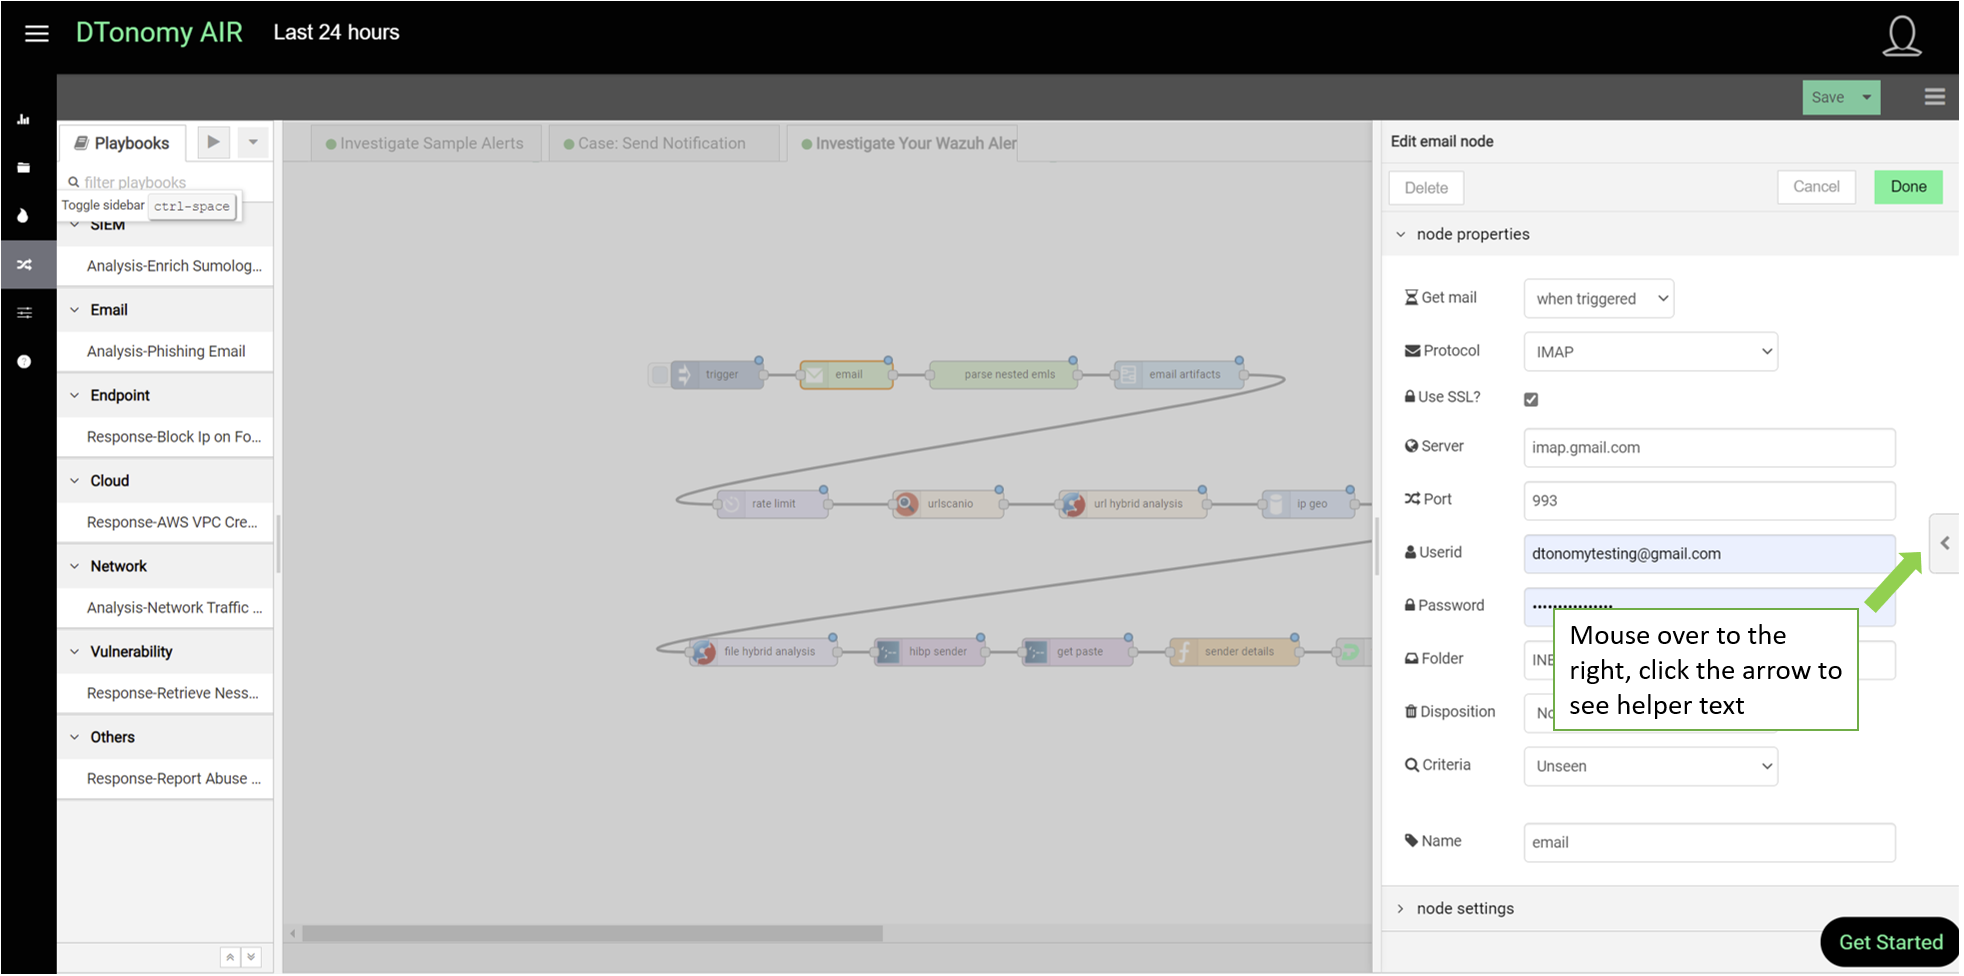
3. Helper instruction text
Mouse over to the right, you can see the helper on how to configure each node.
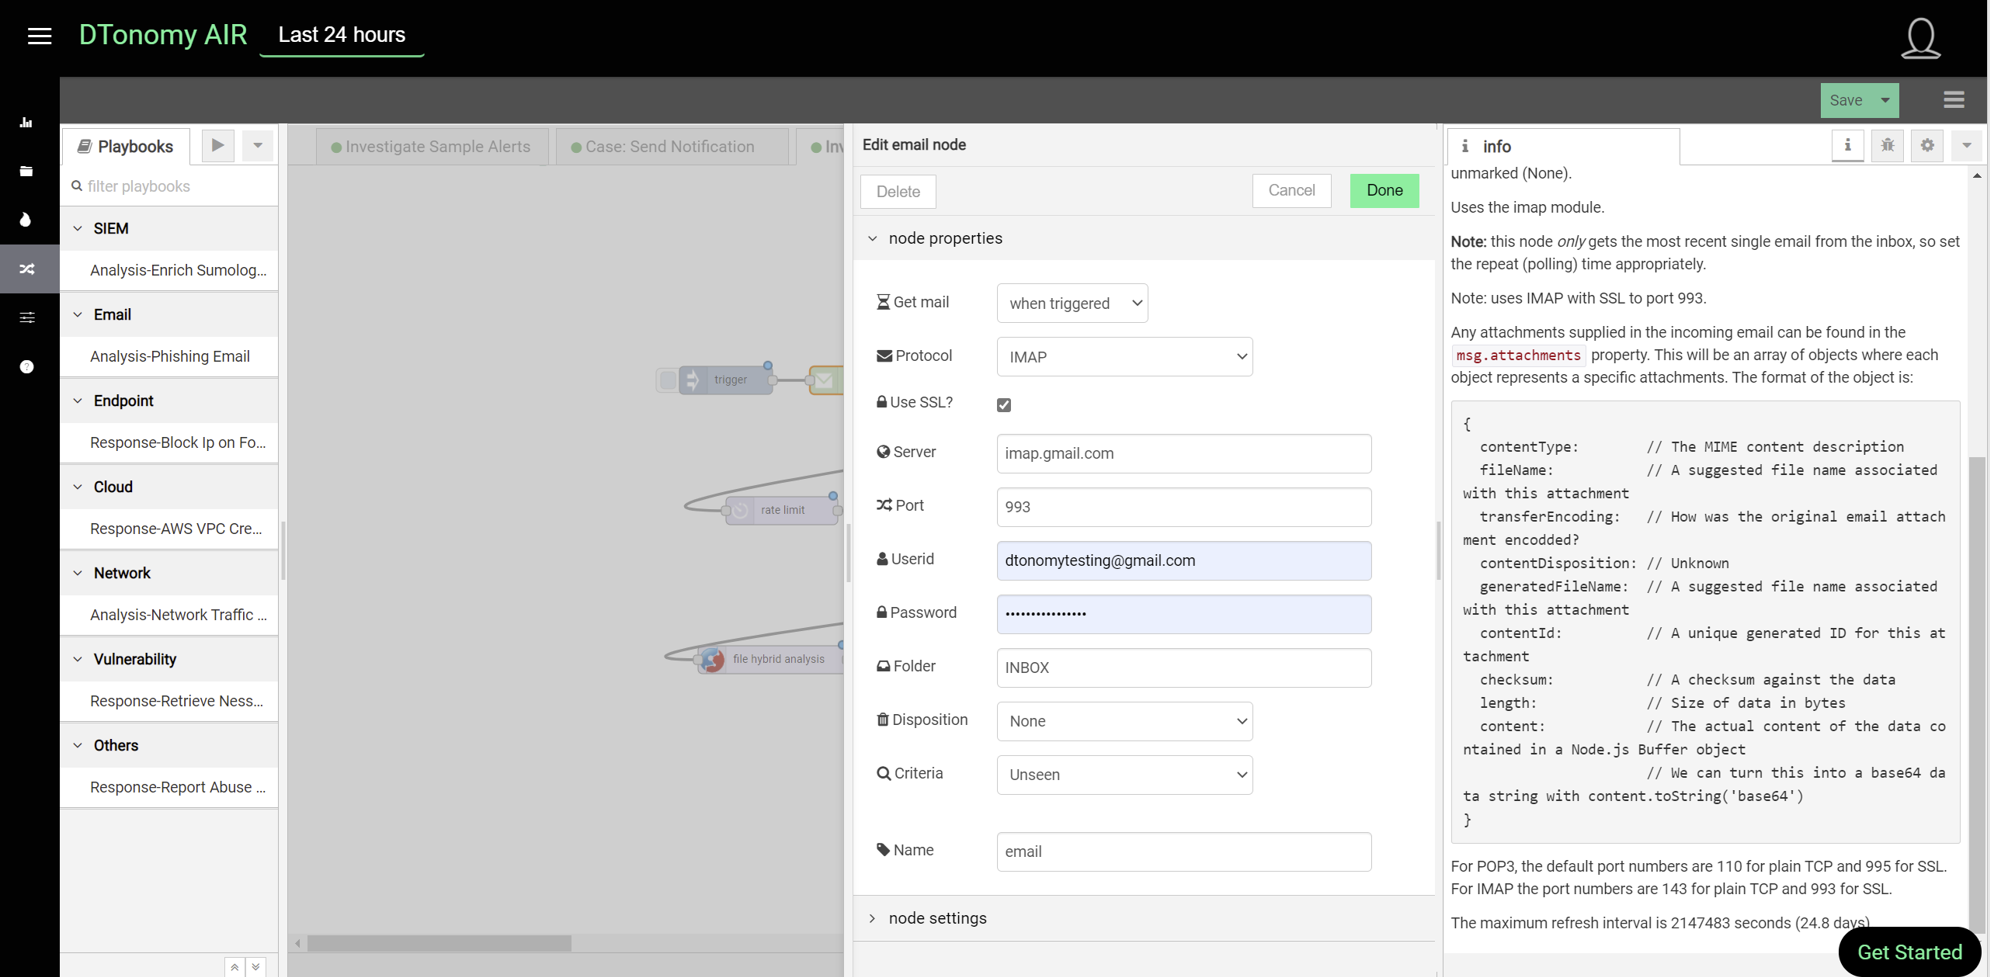
Here is the information panel for the email node.
4. Click the Save button to deploy workflow.
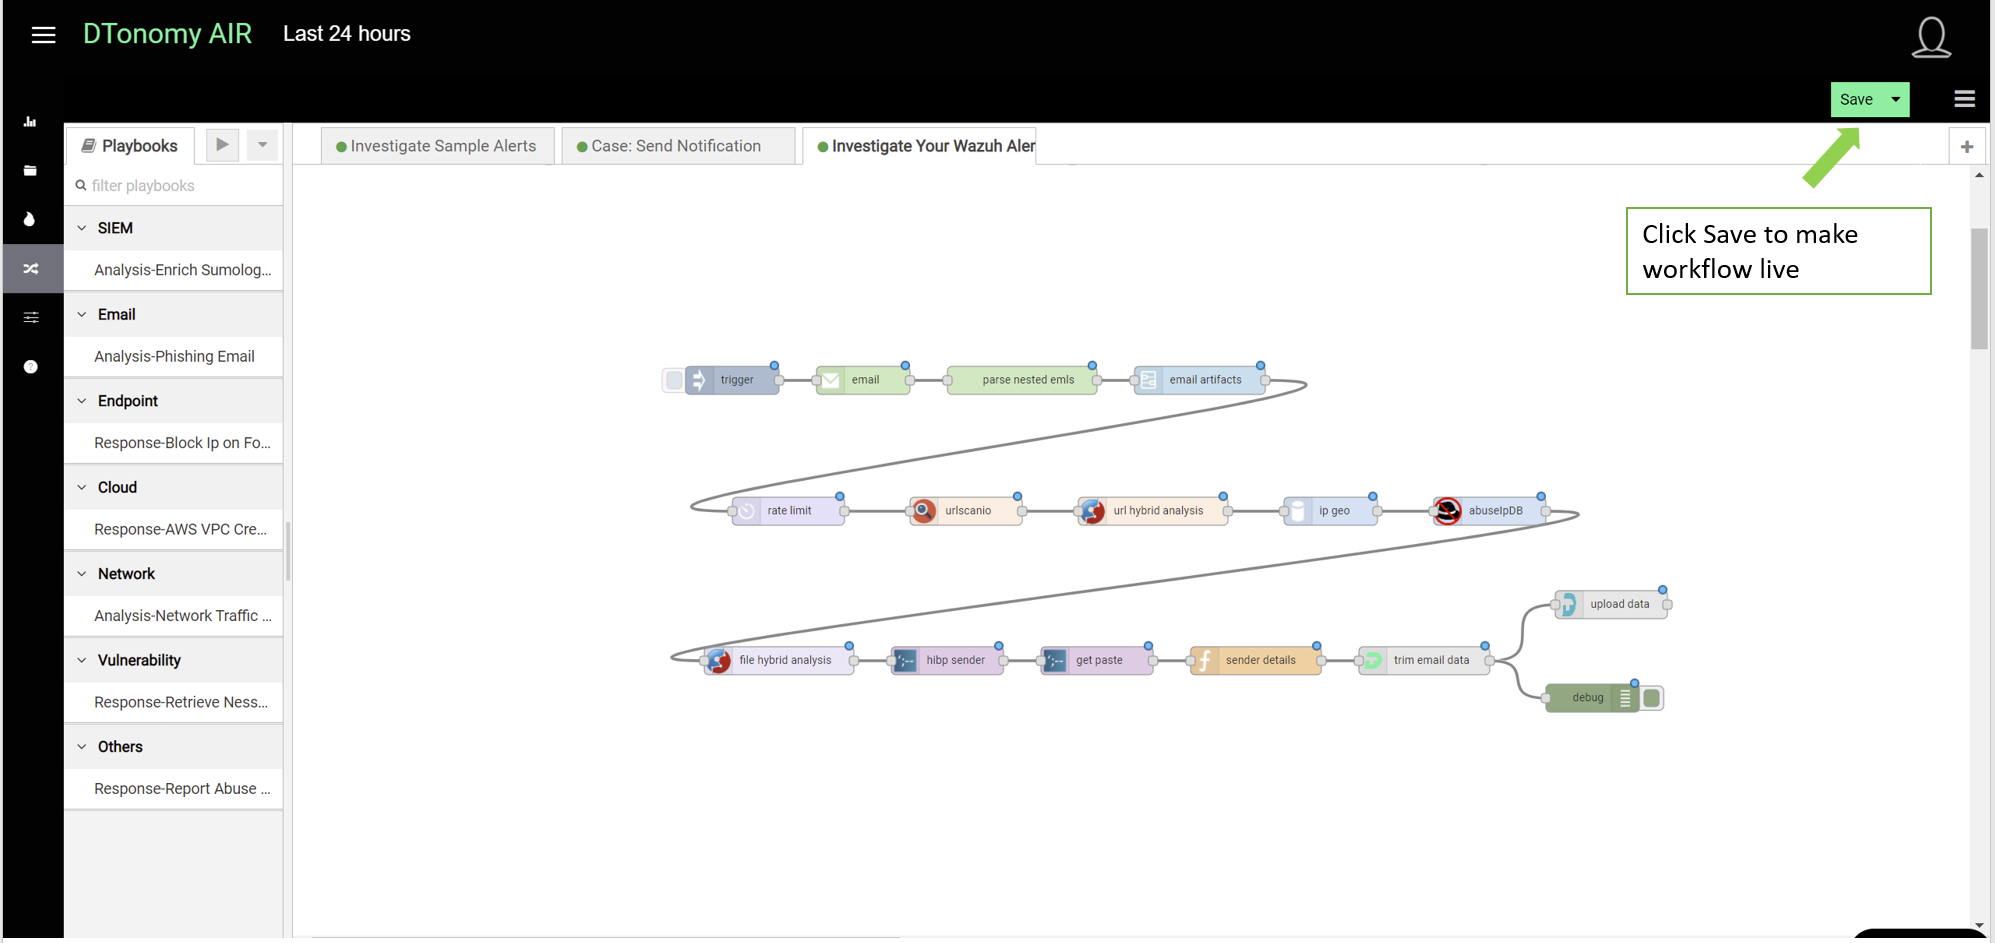
Once saved, it will be live in the background.
5. Run the workflow
Click the arrow on the left to run the workflow.
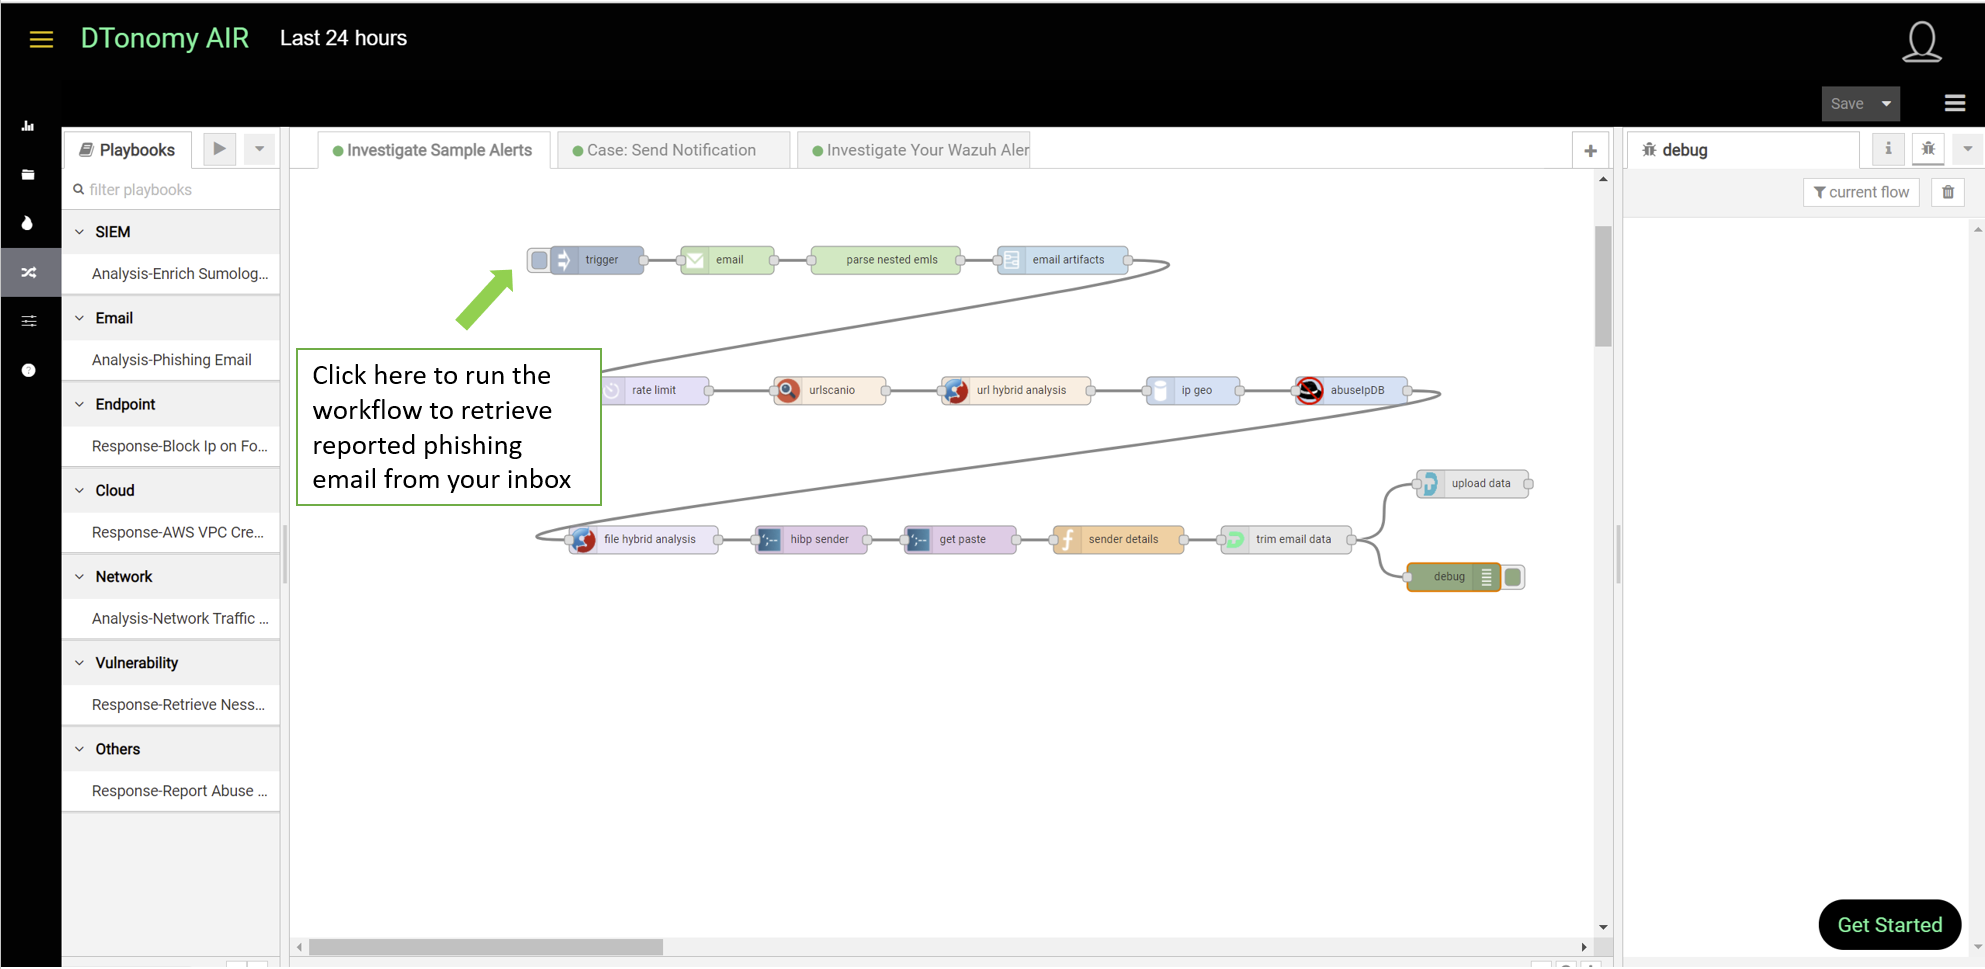
The workflow automatically retrieves new unseen emails from your inbox. It then automatically parses email entities, correlates with other threat intelligence, and eventually uploads all information to DTonomy server. Depending on the number of emails, it may take a couple of minutes to finish all the automated steps.
6. Viewing Alerts menu
After upload, you can view phishing alerts on the Alerts menu. (Only available on DTonomy AIR)
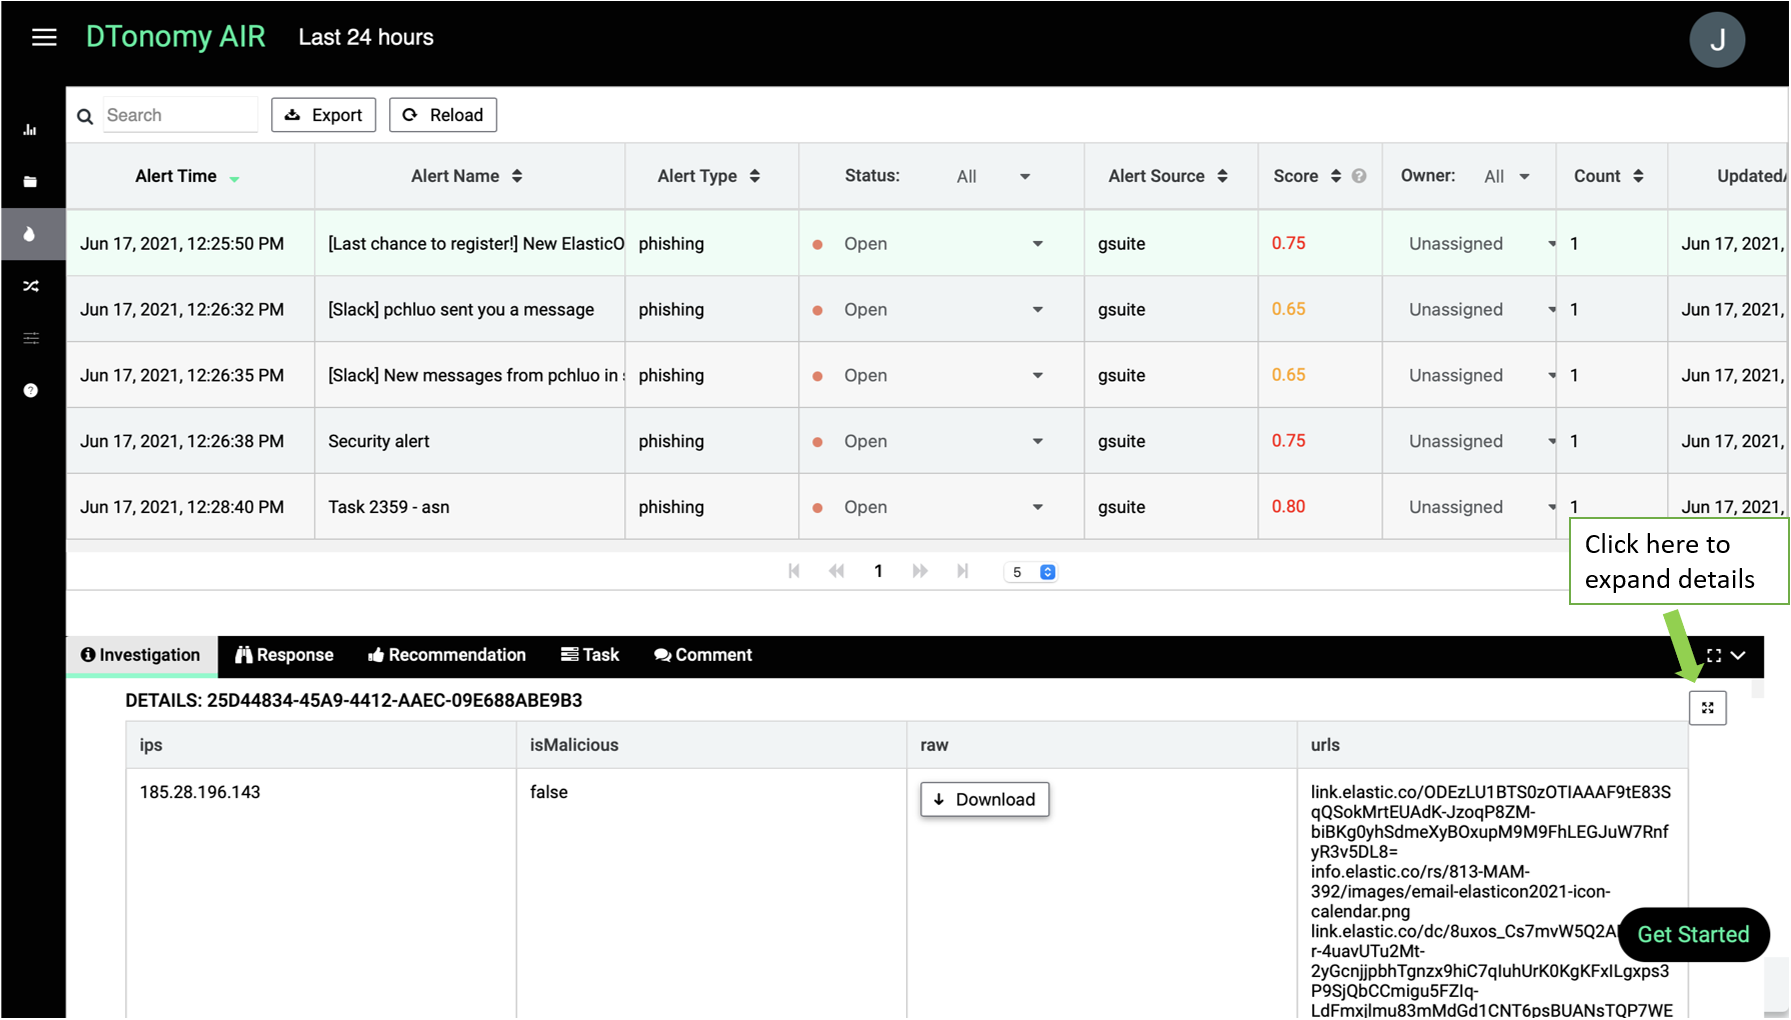
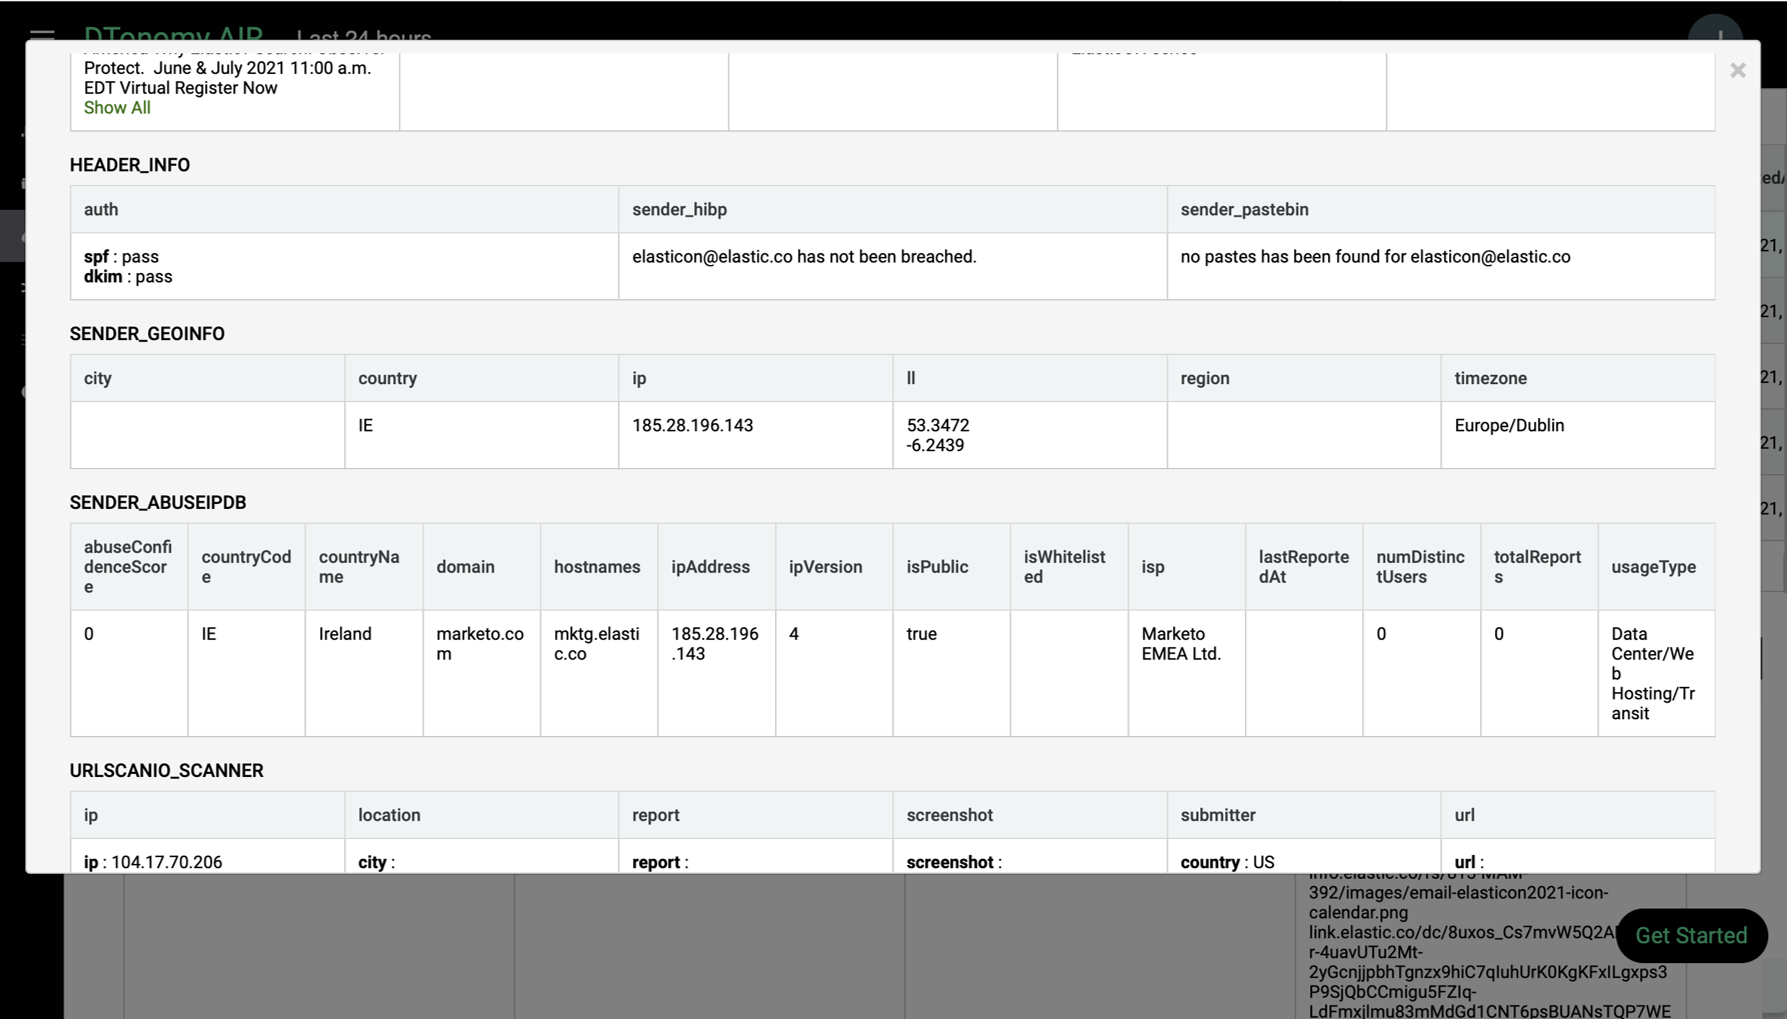
Once you select an alert, you can view relevant alert details. Click the expand icon on the lower bottom details panel, you can start to view the details of alerts.
Checkout videos here: